How to scope custom Webflow code without creating maintenance debt
Webflow
•
X min
•
Published on
06.08.2026
•
Updated on
21.08.2026

Webflow custom code can solve problems that native settings, CMS structure, or third-party tools cannot cover cleanly. It can also create maintenance debt when it is scoped as “just a small script” instead of a long-term part of the website.
This guide explains how to scope custom code in Webflow before development starts, so your team knows what is being built, where it lives, who owns it, and how it will be maintained after launch.
Maintenance debt is the future cost created when code is added without enough context, documentation, testing, or ownership.
In Webflow, that debt often shows up as broken interactions, scripts that only one developer understands, page-specific fixes copied across the site, or marketing teams being afraid to edit CMS content because a hidden dependency might break.
The problem is rarely the code itself. The problem is vague scope. A custom calculator, advanced filter, animation, integration script, or conditional form behavior can be reliable if its boundaries are clear from the start.
Before scoping Webflow custom code, decide if code is the right solution at all.
Webflow already covers a wide range of website needs through visual layout, components, CMS collections, interactions, forms, hosting, and SEO settings. If your team is still clarifying what should stay native, it helps to first understand what Webflow already covers natively.
Use this decision rule before writing a line of code:
| Approach | Use it when | Typical example |
|---|---|---|
| Native Webflow | The need is mostly layout, responsive behavior, standard interactions, page structure, metadata, or editable content | Hero sections, nav, standard animations, editable pages |
| CMS architecture | The need is repeatable content | Case studies, team members, resources, locations, pricing cards, comparison pages |
| Third-party tool | The need is a mature product function | Analytics, consent management, booking, payments, CRM capture, support chat |
| Custom code | The business rule is specific, the interaction is not native, or data must be transformed in a way Webflow cannot handle alone | Conditional form logic, custom calculator, advanced filter, bespoke integration |
For content-heavy websites, custom code is sometimes requested because the CMS model is under-scoped. A better collection structure can remove the need for scripts that duplicate content, hide fields, or manually rebuild lists. If the request touches dynamic content, review your Webflow CMS architecture before approving code.
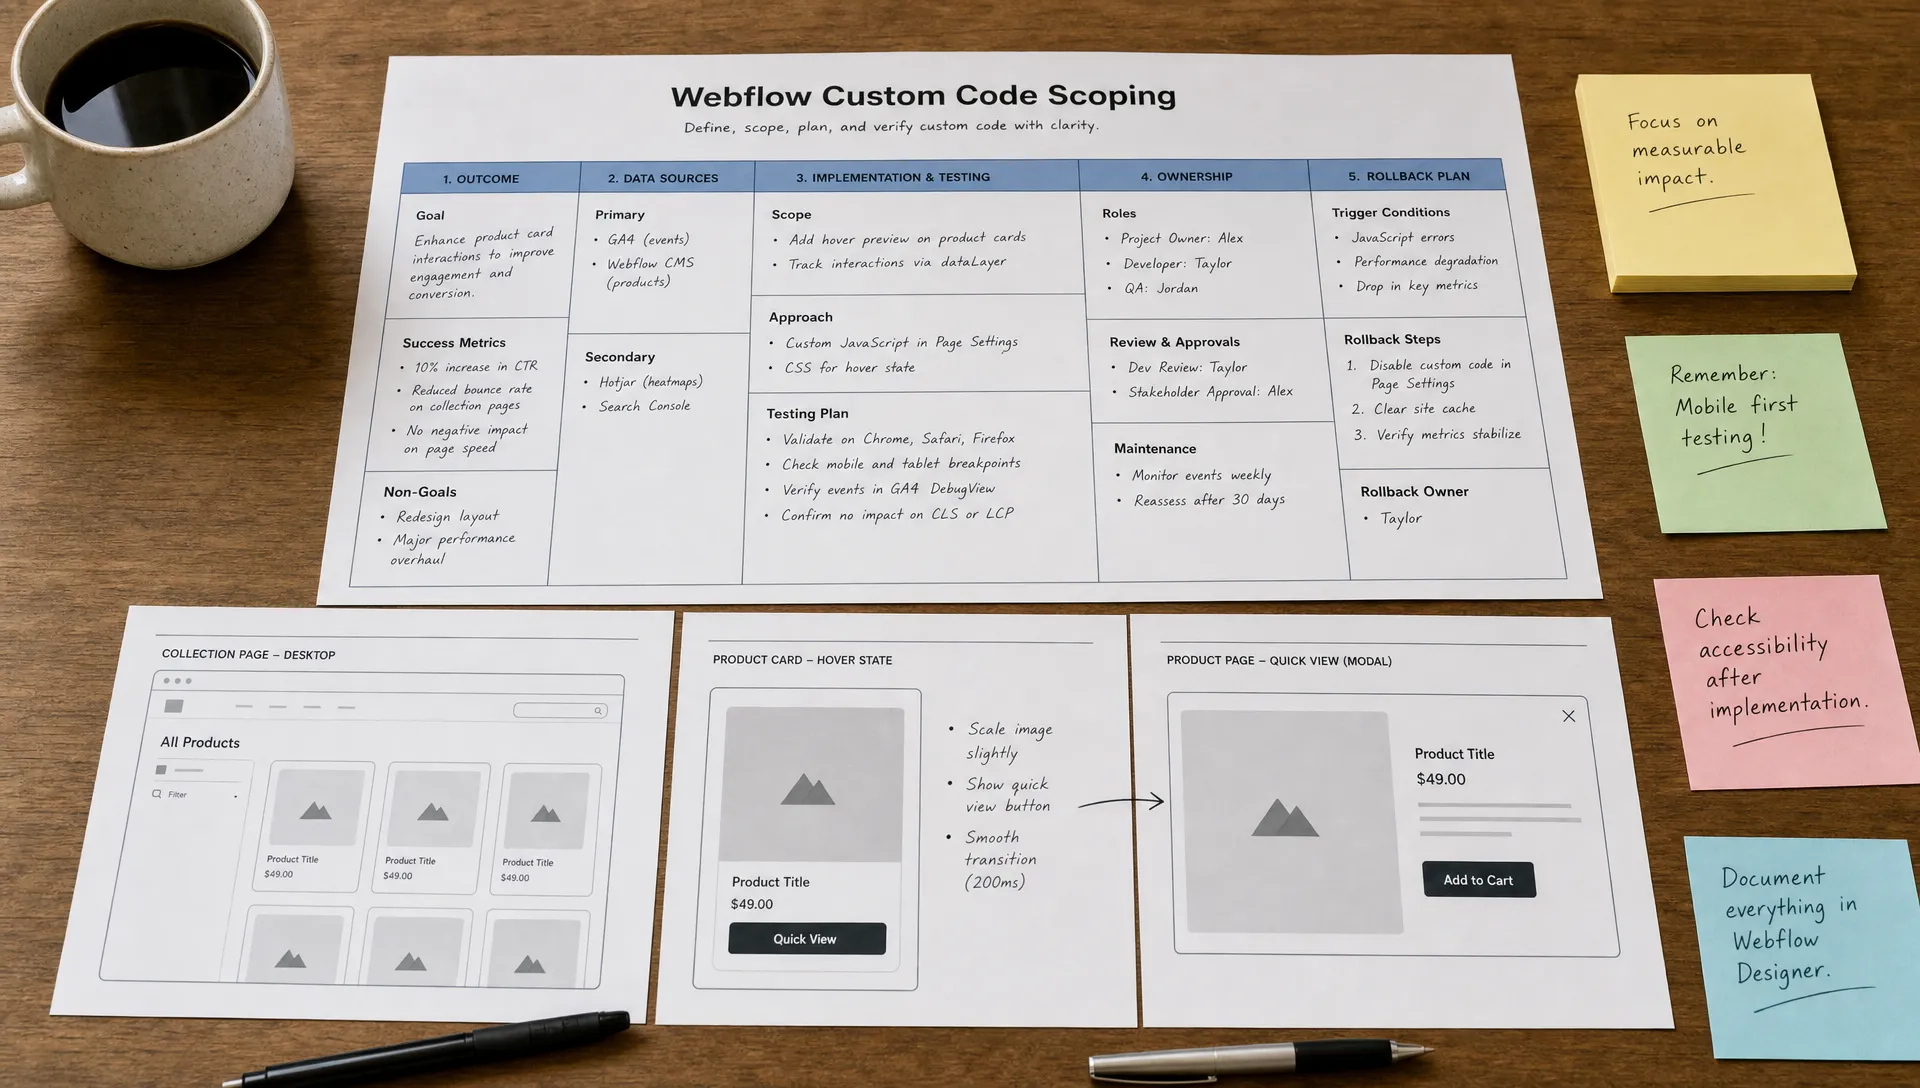
A practical scoping framework keeps custom code tied to business outcomes instead of isolated technical preferences.
Use these five parts for every custom code request, whether it is a small JavaScript snippet or a larger front-end feature.
This framework also works better when the Webflow build itself follows clear naming and structure. If class naming is inconsistent, custom code becomes harder to target safely. For maintainable builds, pair code scoping with a clear Client-First development structure.
A good scope does not need to prescribe the exact code. It needs to remove ambiguity.
Write requirements in plain language first, then let the developer decide the implementation approach. For a marketing site, the goal is not to create a complex engineering spec. The goal is to make future edits safe.
Your requirement note should include these elements:
A small script can be low risk when it is isolated and documented. For example, automating a footer date with JavaScript in Webflow is a narrow use case because the outcome, scope, and fallback are easy to understand.
Most Webflow custom code problems come from decisions made before implementation, not after launch.
These are the mistakes to avoid when scoping custom code:
Once the business scope is clear, define technical guardrails. These make the code easier to locate, review, and replace later.
Webflow custom code can be added at different levels, including site settings, page settings, and embeds. Webflow’s own guidance on adding custom code is useful for understanding where code can live.
The rule is simple: place code as close as possible to where it is needed. Global scripts should be reserved for global behavior, such as analytics, consent tools, or site-wide utilities. Page-specific features should usually stay page-specific.
For more substantial JavaScript, your developer may prefer an external managed file rather than a large script pasted directly into Webflow. That can make version tracking, review, and reuse easier.
Every third-party script is a dependency. That means your site depends on another vendor’s uptime, loading behavior, privacy choices, and future updates.
This does not mean you should avoid all third-party tools. It means the scope should name them clearly. If a pricing calculator depends on a CRM, an analytics library, or a data enrichment service, that dependency belongs in the scope.
Developers should also decide how scripts load. Loading behavior affects performance and reliability, especially when scripts depend on each other. MDN’s documentation on the script element is a useful reference for concepts such as async and defer.
Custom code can affect performance when it loads large libraries, requests external assets, injects heavy media, or runs on pages where it is not needed.
This matters for user experience and cost control. If a script adds videos, large images, external files, or repeated requests, include performance expectations in the scope. For broader cost control, review the principles behind reducing bandwidth consumption in Webflow.
A simple requirement can be enough: “Do not load this script outside the pricing page,” or “Do not block the first visible content from rendering.” The point is to make performance part of the acceptance criteria, not an afterthought.
Custom code should be tested against the actual conditions it will face after launch.
That usually means testing on key breakpoints, modern browsers, CMS items with complete and incomplete content, form success and error states, and pages where the script should not run. If the code supports a conversion path, test the full path, not just the visual behavior.
A rollback plan is also part of release quality. Your team should know whether rollback means removing a page-level snippet, disabling a third-party script, reverting a hosted file, or restoring a previous Webflow version.
Custom code changes the maintenance model of a Webflow site because someone must review, test, and update it over time.
That does not make custom code a bad choice. It means the maintenance cost should be visible before the feature is approved. If your team is budgeting post-launch support, this connects directly to how you think about website maintenance pricing.
Ask four questions before launch:
These questions also affect budget planning. Custom code is not only an implementation task. It can involve scoping, QA, documentation, monitoring, and future revisions. If you are planning a full Webflow project, include those layers when reviewing Webflow pricing and budgeting.
Use this checklist before approving custom code for a Webflow project.
If you cannot complete the checklist, the feature may still be worth building. But the missing items should be treated as open decisions, not ignored.
Not every custom feature belongs in the first release. Scope should protect launch speed as well as maintainability.
If the code supports a core conversion path, such as lead qualification, demo booking, pricing selection, or campaign tracking, it may belong in phase one. If it supports a secondary interaction, decorative animation, or a future content idea, it can often wait.
A useful filter is reversibility. If the custom feature can be added later without rebuilding core page structure, delay it until the business need is proven. If delaying it would require reworking CMS fields, forms, or tracking architecture, scope it earlier.
This keeps the website build focused. Custom code should support the strategy of the site, not become a place where every unresolved preference is stored.
Webflow custom code should be scoped like a small product feature, not treated as a quick paste-in fix. The right scope defines the outcome, surface area, dependencies, ownership, and exit plan before implementation begins.
Your next step is to take one proposed custom feature and run it through the checklist above before any code is written. If your next Webflow project includes custom behavior and you want a second look at the scope before development, ask BeBranded to review your Webflow custom code scope.